Introduction
Mask testing is a common method of estimating whether a transmitted waveform is of sufficient quality to meet system requirements. In most systems the requirement is to pass bits error free, or at least at better than 1 error in every 1012 bits - a bit error ratio (BER) of better than 1x10-12. As can be seen in Figure 1, from an eye diagram point of view, this means ensuring that no portion of the eye encroaches at or near the center, including low probability edges. In other words, no part of the signal can cross over into the mask (Figure 1 (iii)), causing a mask hit or failure. Herein lies the biggest issue — whether the test methodology is capable of catching low probability events — the waveforms that violate the mask but occur very infrequently.
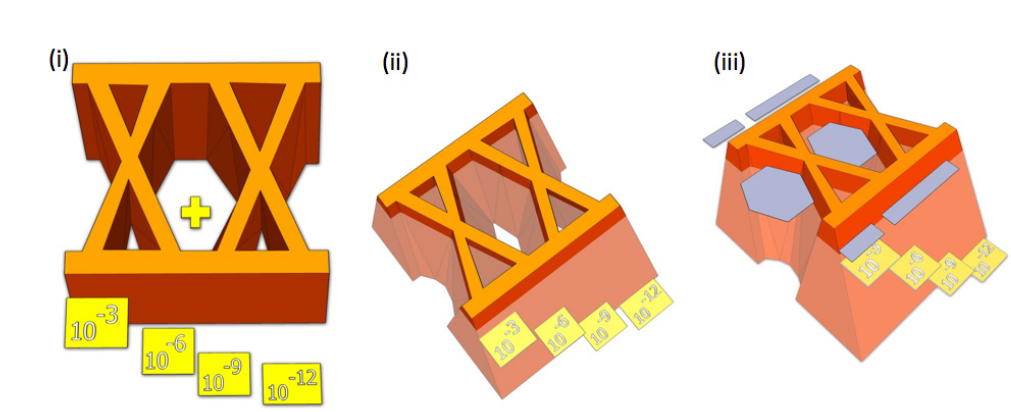
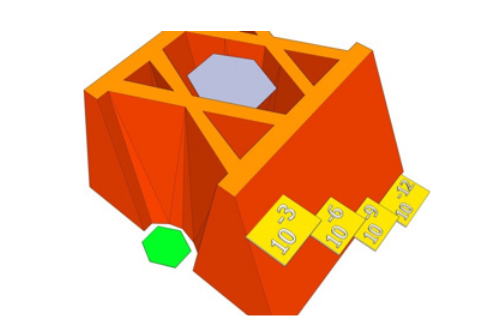
Typical eye diagram-based mask tests are composed of anywhere between a few hundred to a few thousand waveforms. In depth terms, this puts the testing no deeper than about 1x10⁻³ or 10-4. Ideally a test would be specified at 10-12(1) to catch low probability events that would go undetected in a shallow mask test, and indeed some standards now require mask testing to be passed at such depths. In practice this means changing measurement methodology to a BER-based one such as BER Contour, and the BERTScope has a feature called Compliance Contour that does exactly this. However, measuring to such depths takes longer than is usually acceptable in manufacturing environments. A deep mask is illustrated in Figure 2 (in green).
What is 'Six Sigma' Mask Testing?
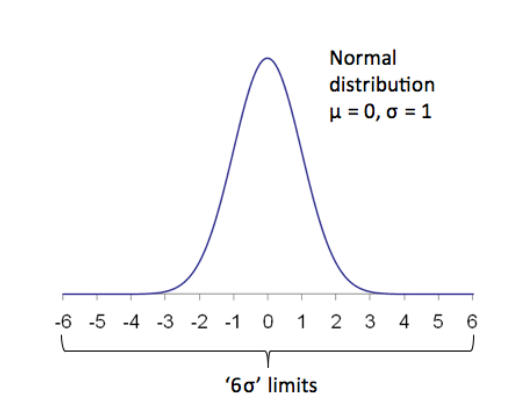
From the concept championed by Motorola, '6σ' requires better than 3.4(2) defects per million opportunities (DPMO). Applied to signal integrity testing, this equates to 3.4 mask hits or failures per one million waveforms tested. This sounds impressive, and it is a step forward compared to shallow mask testing, but remember that most standards are requiring systems to operate 6 orders of magnitude better than this - less than one defect in 1012 , or a million, million bits. One advantage that a '6σ' regime has over traditional mask testing is that a depth, or number of waveforms, is specified. A longstanding gripe about many older standards is that no factual information was given and people were free to pick any number they chose, resulting in confusion and poor correlation between suppliers and customers.
There are several types of test equipment that are capable of deep mask testing. In the following examples we will look at how a BERTScope illustrates factors that need to be considered when doing '6σ' mask testing.

Measured Example Using Different Pattern Lengths
Our test setup was a simple electrical configuration with the BERTScope pattern generator looped back to the analyzer through a short length (9″) of circuit board. Many standards require testing using long patterns such as PRBS-31. In this example we have used this, and also the much shorter PRBS7 pattern. Figure 4 shows measurements made at 10.3125 Gb/s with a PRBS-31 pattern. The mask test could either have been set up for one mask violation in 294,118 waveforms, or as we did, looking for less than four violations in 1,000,000 waveforms. As can be seen, we set an alarm to indicate when four or more violations were detected. We made two separate measurements under identical conditions, one of which passed and the other failed. So what is going on?
The issue here is that the link has low probability events occurring less frequently than once in a million waveforms. In a given test of one million waveforms, mask violations observed are due to variations in Inter-Symbol Interference (ISI) from the >2 billion bit long PRBS-31 data pattern. It is a matter of luck whether any given shallow measurement happens to catch one of these infrequent events.
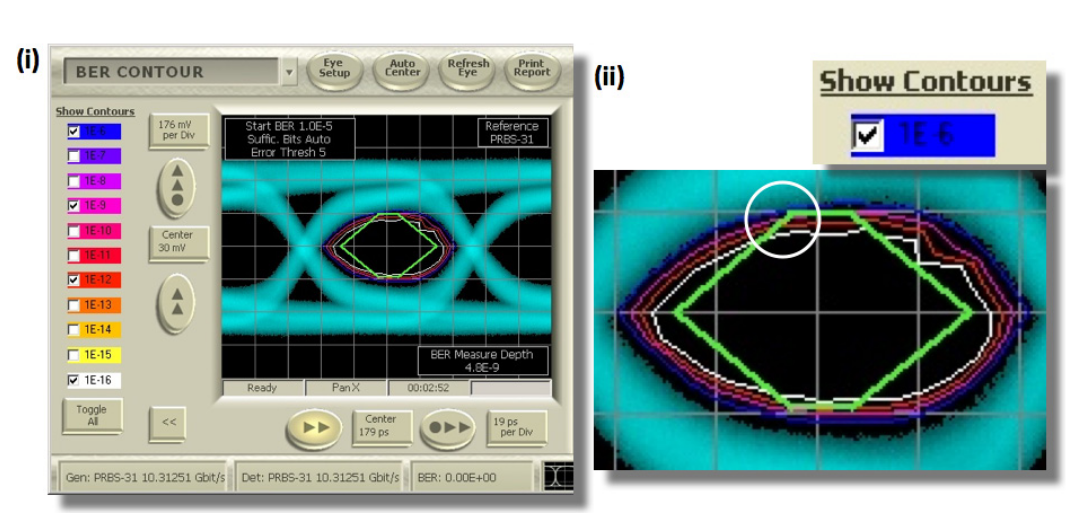
A more revealing view comes when a BER-based measurement is used. Using Compliance Contour[iii], it is possible to superimpose the mask on top of a BER Contour measurement. As can be seen in Figure 5, the mask is just touching the 1x10⁻⁶ contour line (blue), which is why some '6σ' masks tested on a PBBS-31 data pattern for four errors in one million waveforms pass, and some do not.
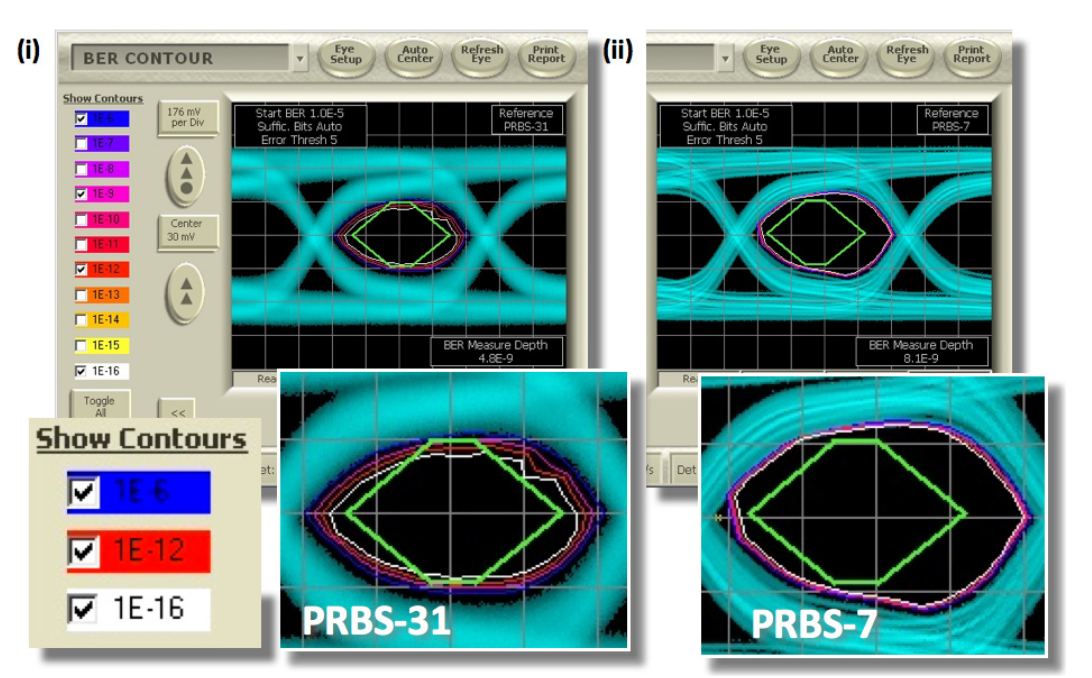

PRBS-31 is a difficult pattern in many circumstances, which is one reason it is frequently chosen by standards bodies for test. With a length of a little over 2 billion bits, it contains infrequently repeating features that would be missed by a shallow measurement. A PRBS-7, on the other hand, has only 127 bits. The differences are seen easily in Figure 6, where the same measurement as Figure 5 is displayed next to one under identical conditions except for a pattern length change. Here a '6σ' mask test would probably have fully revealed device performance.
Also recorded with these measurements was the time taken for each. It is worth noting that '6σ' test times on the BERTScope are independent of pattern length, but they are dependent on data rate — the higher the data rate, the faster the measurement.
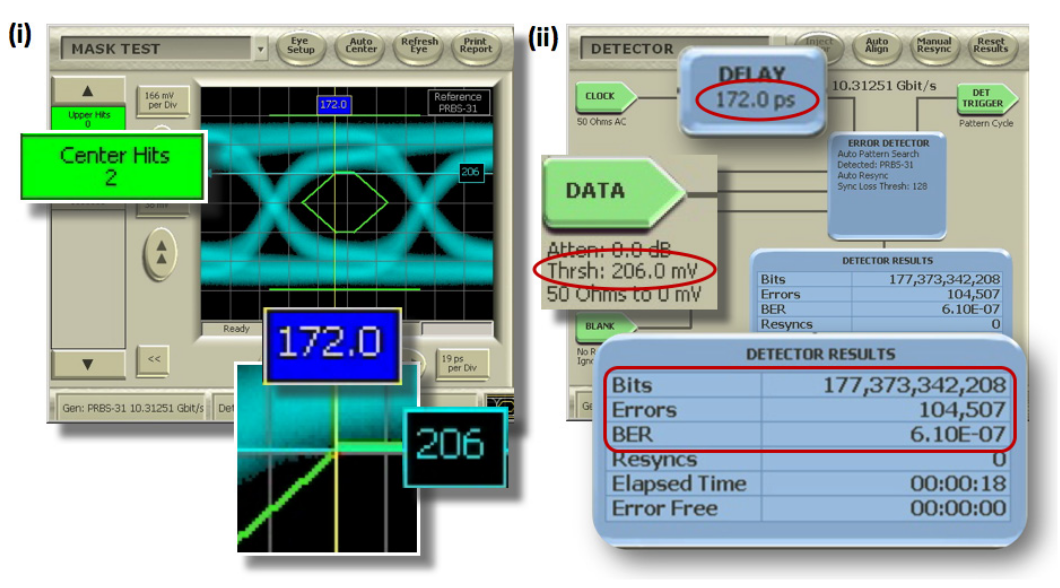
Finally, the BERTScope Bit Error Rate Tester provides a way to easily validate mask failures. As shown in Figure 7, the eye diagram cursors can be used to set the sampling point in the detector. Running a BER test verifies the mask hits and also directly measures the probability of mask violations at that point.
Summary
'6σ' is a form of mask testing that provides for critical insight when mask testing depth specification are important for pass/ fail testing or deeper evaluation on high-speed signaling standards.
The BERTScope is capable of making mask tests, including '6σ,' and many other measurements including BER-based Compliance Contour, to provide a significantly more complete picture of device performance.

